
Summary and Schedule
About This Lesson
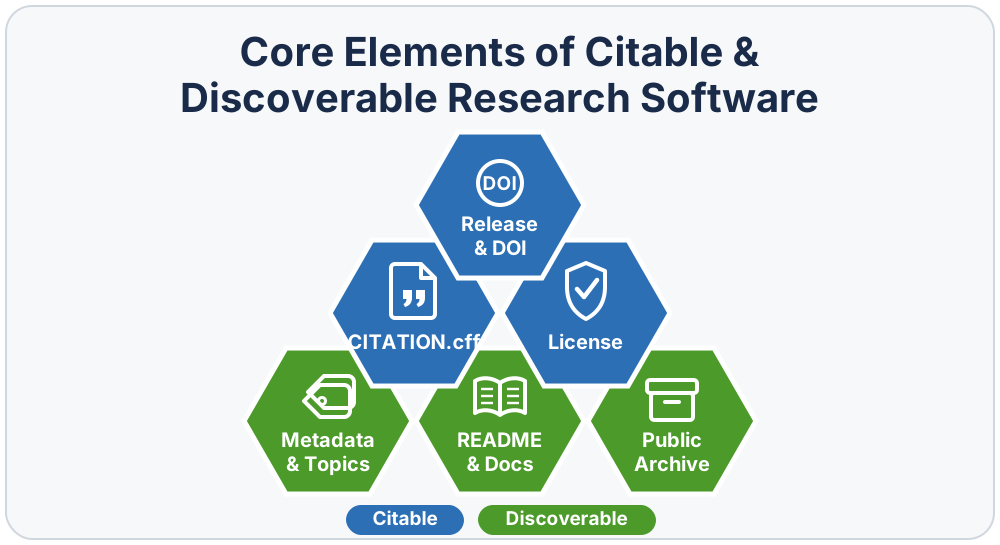
This lesson teaches the practical steps that make research software
citable, discoverable, and reusable: choosing an
open-source license, adding a CITATION.cff file, minting a
DOI for a versioned release, and improving metadata to help people find
and credit the software. An optional final episode covers reproducible
environments with pixi. Together these steps map to the FAIR principles
for research software (FAIR4RS).
It is written first for library, OSPO, and scholarly communications staff and other research support professionals who help researchers make software count as scholarly output. Each episode also carries a “Supporting others” thread for that consulting work. Researchers who write code and want to make it citable themselves will find the same steps apply directly to their own repositories.
Learners work in the browser, making small, high-value improvements to a real GitHub repository, and leave with both a citable project and a reusable way to advise others.
How This Lesson Works
You’ll work in your web browser, in your own fork of a small demo repository. Each episode adds one piece to your fork: a license, a citation file, a release with a DOI, then richer metadata. By the end you’ll have a complete, citable repository you built yourself.
The upstream repository maintains a set of view-only
reference branches (02-add-license,
03-add-citation, 04-create-release,
05-add-metadata) that show the target state after each
episode. If you fall behind or want to check your work, open the
matching branch in GitHub’s branch dropdown and compare.
The only episode that needs software installed on your computer is the optional pixi episode at the end. Everything else runs in the browser. See Setup to get ready.
Learning Objectives
After completing this lesson, learners will be able to:
- explain why research software should be cited and attributed.
- add and validate a CITATION.cff file in a GitHub repository.
- choose and apply an appropriate open-source license.
- improve software discoverability through documentation and metadata.
- understand how packaging tools like pixi can support usability and reproducibility.
- describe how these practices support FAIR principles for research software.
- identify small, high-value improvements that increase the visibility and impact of their software.
Prerequisites
For the core lesson, you need only a GitHub account and a web browser. Before beginning, it helps to be able to:
- navigate GitHub in a web browser (view and edit files, open issues).
- recognize basic Git concepts such as commits and repositories — you will not run Git locally.
- edit plain-text files.
You don’t need any prior experience with software packaging, metadata standards, or licensing.
The optional final episode on reproducible environments with pixi is the only part that requires software installed on your computer. See Setup for both tracks.
Acknowledgment
This lesson is derived from the Building Better Research Software curriculum, created by Sarah Gibson, Aman Goel, Toby Hodges, Sarah Jaffa, Kamilla Kopec-Harding, Aleksandra Nenadic, Colin Sauze, and Sarah Stevens.
A full citation and DOI for the original lesson appear on this lesson’s Cite This Lesson page, automatically generated from the repository’s CITATION.cff file.
| Setup Instructions | Download files required for the lesson | |
| Duration: 00h 00m | 1. Introduction: Software as a Citable Research Output |
Why is research software so often uncredited and hard to find? Why isn’t a GitHub URL a real software citation? How do FAIR4RS principles make software citable and discoverable? |
| Duration: 00h 25m | 2. Sharing Research Software Effectively |
Why share research software in a public repository? What are the minimum elements that make a repository useful and discoverable? |
| Duration: 00h 47m | 3. Choosing an Open-Source License |
Why do you need a license for your code? How can an open-source license increase reuse and citation? What licenses does the UC system recommend? |
| Duration: 01h 17m | 4. Adding a CITATION.cff File |
What is a CITATION.cff file and why does it matter? How does GitHub use CITATION.cff to generate ready-made citations? What minimal metadata should researchers include? |
| Duration: 01h 47m | 5. Making Your Software Citable |
What makes software citable? How do releases and DOIs strengthen software citation? How do I create a release and, optionally, mint a DOI? |
| Duration: 02h 22m | 6. Improving Metadata and Discoverability |
What metadata makes research software easier to find and reuse? How can we improve discoverability across GitHub, Zenodo, and scholarly indexes? |
| Duration: 02h 52m | 7. Managing Reproducible Environments with pixi |
Why do software projects need well defined environments? How can pixi help learners run the same code the developer
used?How does environment management improve the reproducibility and citability of research software? |
| Duration: 03h 22m | 8. Wrap-Up and Reflection |
What small steps can make your research software more citable and
discoverable? How can you apply these practices to your current or future projects? |
| Duration: 03h 42m | Finish |
The actual schedule may vary slightly depending on the topics and exercises chosen by the instructor.
This lesson runs almost entirely in your web browser. For most of it you need nothing more than a GitHub account. Only the optional final episode (reproducible environments with pixi) asks you to install software on your own computer.
Check with your instructor which track your workshop is running before you install anything.
- Citation-focused track (default): licensing, CITATION.cff, releases, DOIs, and metadata. Browser only.
- Full track: everything above, plus the optional pixi episode, which needs a local install.
Citation-focused track — browser only
You will fork a demo repository and add a license, a citation file, a release with a DOI, and metadata, all through GitHub’s web interface.
You need:
- A GitHub account — free at https://github.com/join.
- A modern web browser.
That is all: no Git, no terminal, and no other software are required for this track. A desktop text editor (VS Code, VS Codium, Sublime, …) is optional; GitHub’s built-in editor handles everything.
Fork the demo repository (do this before the workshop)
The lesson uses a demo repository called
software-demo, and you work in your own
fork of it.
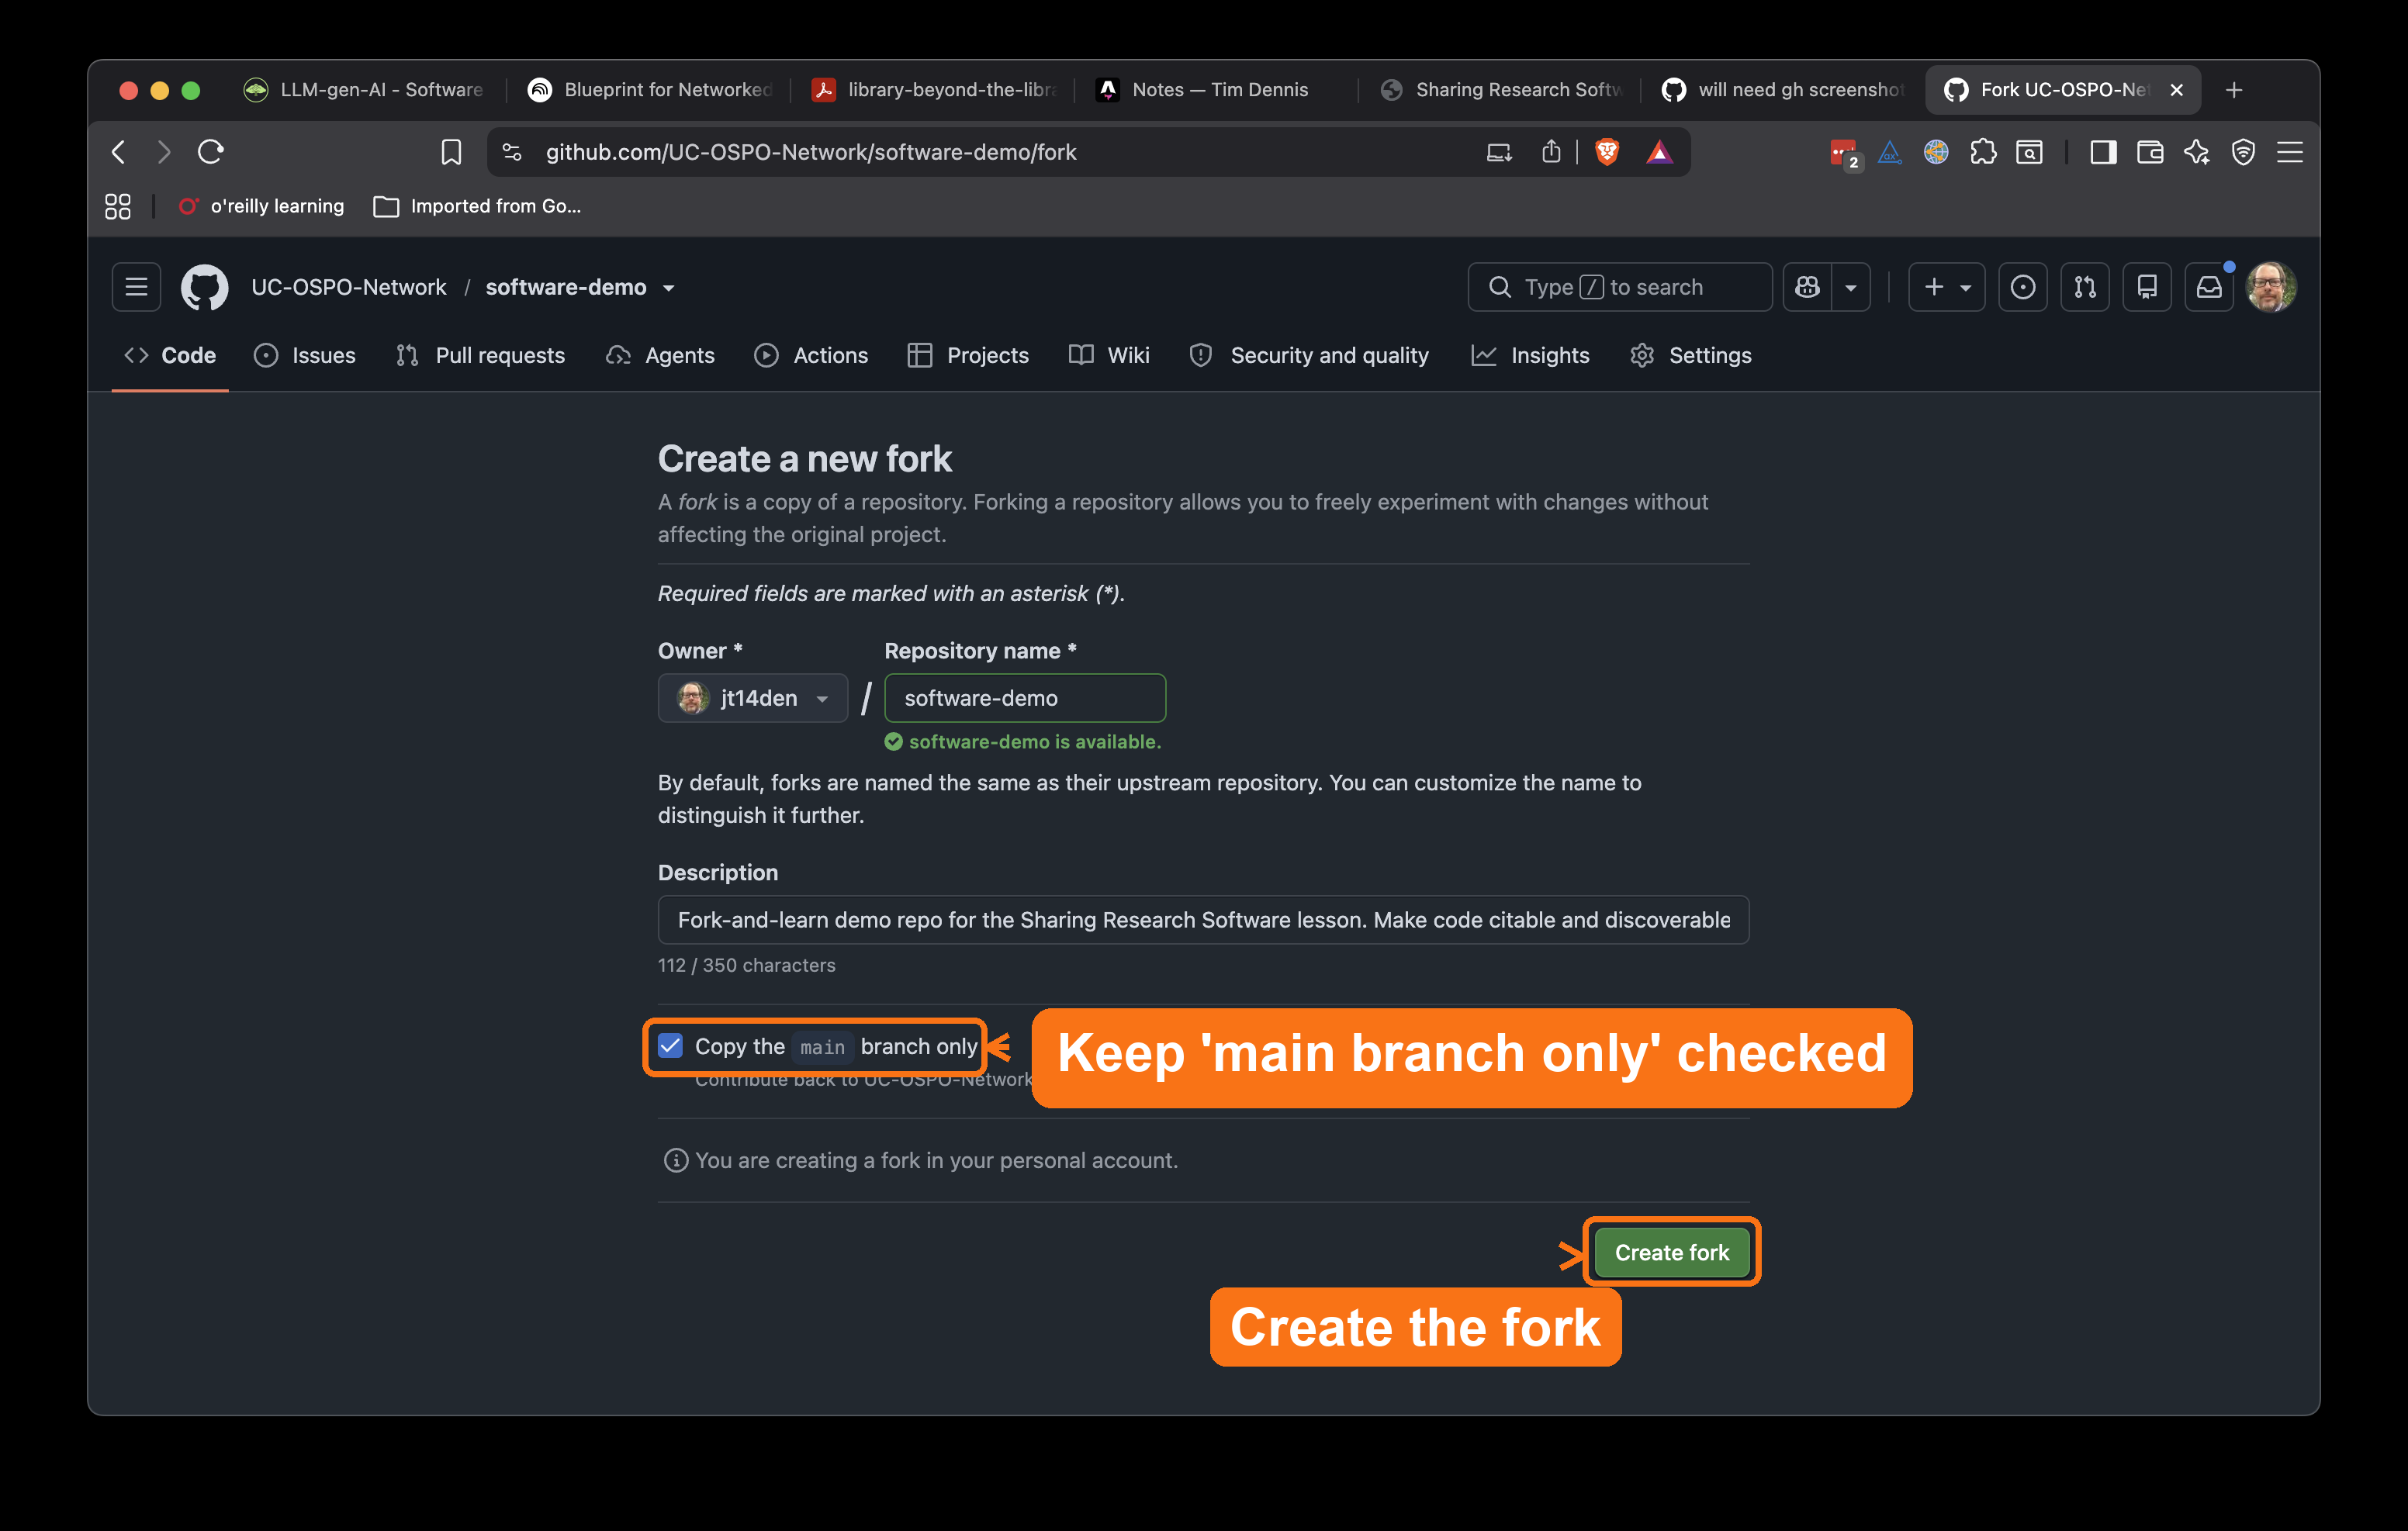
- Sign in to GitHub.
- Go to https://github.com/UC-OSPO-Network/software-demo.
- Click Fork, then Create fork. The
default settings are fine; you only need the
mainbranch. - You now have your own copy at
https://github.com/YOUR-USERNAME/software-demo. Itsmainbranch is the bare starting state — no license, citation file, release, or metadata. That is intentional; you will build it up over the lesson.
Checking your work: reference branches
The upstream repository
(UC-OSPO-Network/software-demo) keeps view-only
reference branches that show the target state after
each episode:
| Branch | Shows the repo after… |
|---|---|
main |
the starting state (what you fork) |
02-add-license |
Episode 2, license added |
03-add-citation |
Episode 3, CITATION.cff added |
04-create-release |
Episode 4, release + DOI |
05-add-metadata |
Episode 5, full metadata (the finished repo) |
06-optional-pixi |
the optional pixi episode |
If you fall behind or want to compare, open the upstream repo, switch to the matching branch in the branch dropdown, and look at the files. Because each episode adds an independent piece, falling behind never blocks you: you can copy a file you missed from its reference branch. You never edit the reference branches; they are an answer key.
Full track only — local setup for the optional pixi episode
Set this up only if your instructor has confirmed the full track. The pixi episode is the one part of the lesson that runs on your own machine. If you are on the citation-focused track, skip this whole section — you do not need Git, a terminal, or pixi.
In addition to the GitHub account above, you will need Git, pixi, and a local clone of your fork.
2. Install pixi
pixi is a fast, cross-platform environment and package manager.
Full instructions and troubleshooting: https://pixi.sh/latest/
Before the workshop, confirm (full track only)
Open a terminal and check that both tools respond:
Authentication note
If you are prompted to authenticate when you clone, GitHub can sign you in through the browser: follow the link that appears in the terminal, sign in, and return. You do not need SSH keys or personal access tokens for this lesson.
Timing. Budget 5–10 minutes at the start to confirm
everyone has a GitHub account and a fork of software-demo —
this is the single most common blocker, so clear it before Episode 1.
Full-track learners must install pixi ahead of the workshop,
not mid-episode.
Verification. Ask learners to open their fork, click
Add file → Create new file, and confirm they can commit
to their main branch. For full-track learners, confirm
git --version and pixi --version return values
locally.
Common issues.
- Some institutional devices require browser sign-in for GitHub access.
- Windows full-track users may need to set Git Bash as the terminal in VS Code.
- If pixi is installed but “not found,” restart the terminal (or VS Code) so PATH updates apply.
See the Instructor Notes for the full fork-alignment setup, including how to teach from your own fork so you and the learners share the same starting state.